Fat Elvis Low Poly Game Character Workflow:
There are several approaches to workflow. I will demonstrate one that i have favored in recent months since the advent of Dynamesh in Z-Brush 4r2.
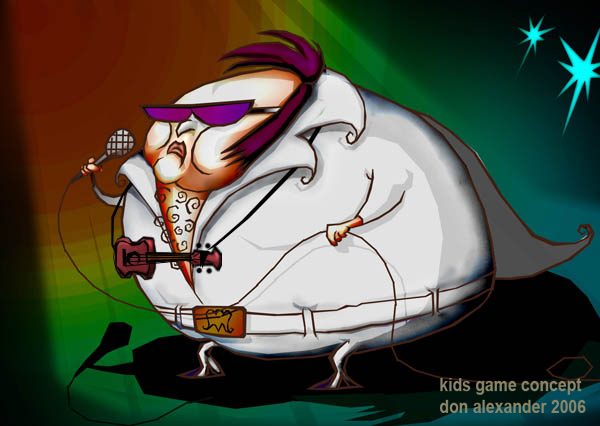
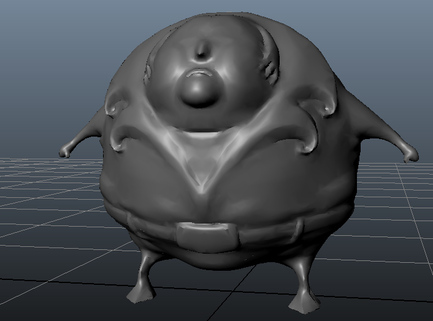
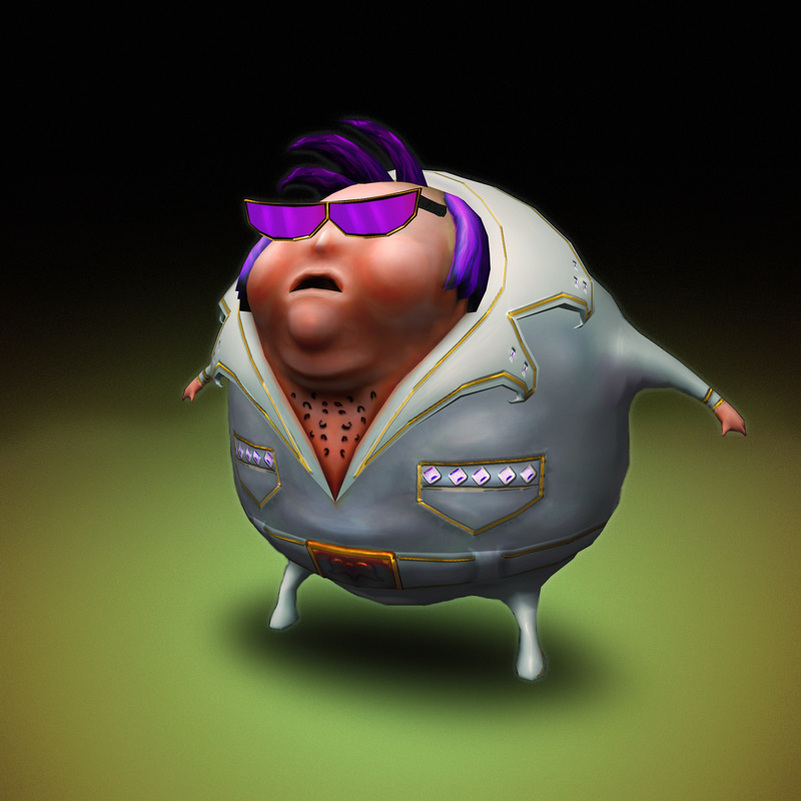
Firstly we start with the concept. This is an older concept that i have been thinking about bringing into the 3rd dimension for a while now. The character is heavily stylized. I prefer fun cartoon stylized more than hyper realistic but i have worked with both. The trick to many stylized, illustrative characters is that often several aspects of the drawing may lack in the 3rd dimension. I believe this adds to the stylization but doesn't always translate very well to 3d because of this. Some might say that construction drawing would fix any of these issues and i agree but that may also restrict the artist. In any case i enjoy the challenge that this brings to the character modeler (or construction drawing artist for that matter). You never know what you are going to get in any given production environment from one concept artist to another or with one project's art style vs another. This character wasn't too flat to imagine in 3d but the hair on his face and head was somewhat two dimensional. Still the drawing cheats perspective overall so the challenge remains!
There are several approaches to workflow. I will demonstrate one that i have favored in recent months since the advent of Dynamesh in Z-Brush 4r2.
Firstly we start with the concept. This is an older concept that i have been thinking about bringing into the 3rd dimension for a while now. The character is heavily stylized. I prefer fun cartoon stylized more than hyper realistic but i have worked with both. The trick to many stylized, illustrative characters is that often several aspects of the drawing may lack in the 3rd dimension. I believe this adds to the stylization but doesn't always translate very well to 3d because of this. Some might say that construction drawing would fix any of these issues and i agree but that may also restrict the artist. In any case i enjoy the challenge that this brings to the character modeler (or construction drawing artist for that matter). You never know what you are going to get in any given production environment from one concept artist to another or with one project's art style vs another. This character wasn't too flat to imagine in 3d but the hair on his face and head was somewhat two dimensional. Still the drawing cheats perspective overall so the challenge remains!
Step 1: Rough out character using Z-Brush Dynamesh
This is where i use the new Dynamesh tool in Z-Brush. It is very is easy to get started with, feels incredibly natural -like a ball of clay, faster to get started with and not as messy. Worth noting here is that one could basically forego the initial 2d illustration phase if wanted and do all the concept work in Z-Brush. I like working either way and i don't think Dynamesh is a replacement for drawing or sculpting. Dynamesh, however may cut down on concept time. This, depending on the artist(s) skill sets the 3d mesh can be used to aid in the creation of a low poly game character or a high res mesh for normal and ambient occlusion maps as well as promotional print and cinematic pieces.
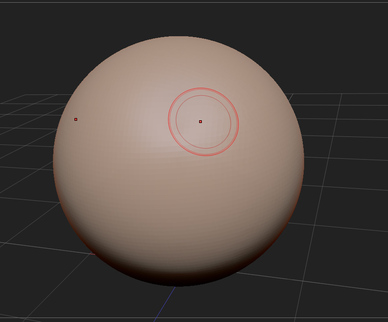
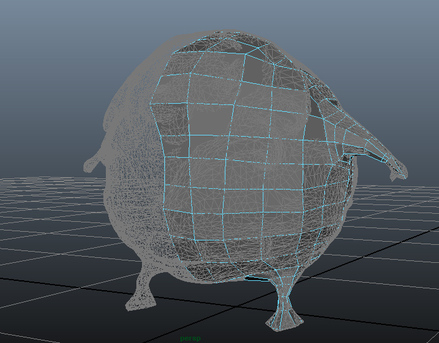
Back to Dynamesh. Our character in general is very much spherical so that is what i started with in Z-Brush.
This is where i use the new Dynamesh tool in Z-Brush. It is very is easy to get started with, feels incredibly natural -like a ball of clay, faster to get started with and not as messy. Worth noting here is that one could basically forego the initial 2d illustration phase if wanted and do all the concept work in Z-Brush. I like working either way and i don't think Dynamesh is a replacement for drawing or sculpting. Dynamesh, however may cut down on concept time. This, depending on the artist(s) skill sets the 3d mesh can be used to aid in the creation of a low poly game character or a high res mesh for normal and ambient occlusion maps as well as promotional print and cinematic pieces.
Back to Dynamesh. Our character in general is very much spherical so that is what i started with in Z-Brush.
Dynamesh lets you simply push, pull, use clay buildup and cutaway. Basically anything you would normally do in z-brush but when polygons get stretched (as they always do) all you have to do is run Dynamesh and the whole model will be reconstructed into nice evenly sized quads that are no longer stretched or distorted.
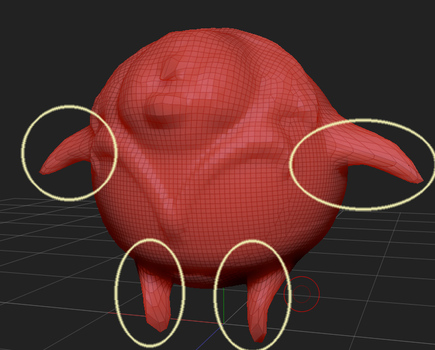
After Running Dynamesh... evenly spaced topology is created allowing you to work with Z-Brush sculpting tools until we have roughly the forms desired. If polys get stretched again simply run Dynamesh.
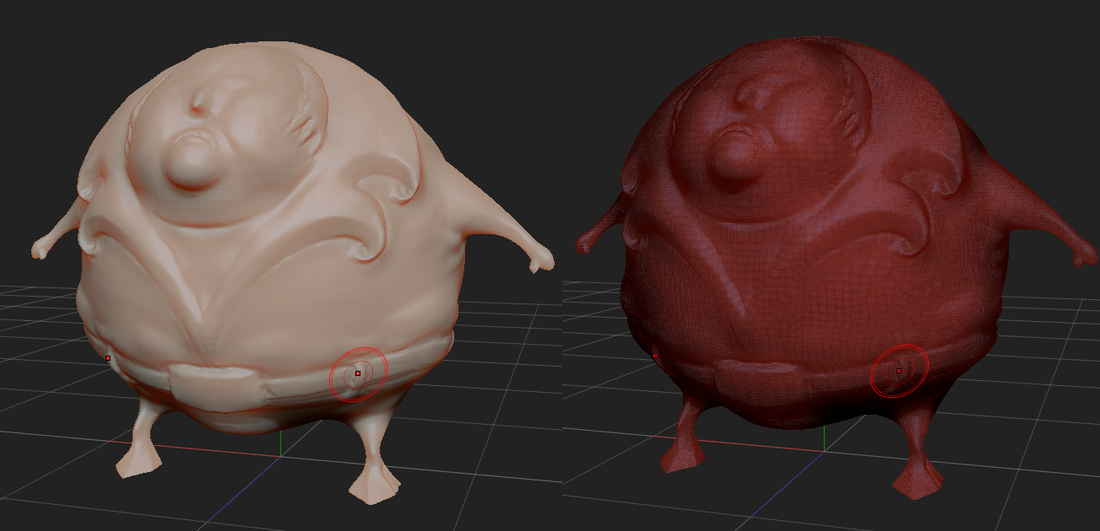
Completed Dynamesh made up of a lot of tiny even quads. Overall sculpting time was a little over an hour. I left the long hair tufts off the top of the head intentionally as i planned on simply sticking them just under the surface and using separate meshes. If required to be a contiguous mesh i probably would have created them in Z-Brush also.
Step 2: Using Roughed Out Dynamesh character as guide, recreate low poly version.
Next export the Dynamesh character to 3dsMax or Maya or any other preferred 3 application. If the poly count is really high you could run the Decimation Master Z-Plugin to reduce the poly count.
Next export the Dynamesh character to 3dsMax or Maya or any other preferred 3 application. If the poly count is really high you could run the Decimation Master Z-Plugin to reduce the poly count.
With the Dynamesh imported into Maya now make the mesh "Live" by selecting it and using menu Modify>Make Live.
Now the mesh will act like a magnet. Any movement of vertex will snap to t's surface and you can deform low poly primitive objects or create polygons and draw them on the surface. I usually use a hybrid of both.
In 3DsMax one could use the new Graphite Free form tools to conform or draw new topology very quickly on top of the imported Dynamesh character.
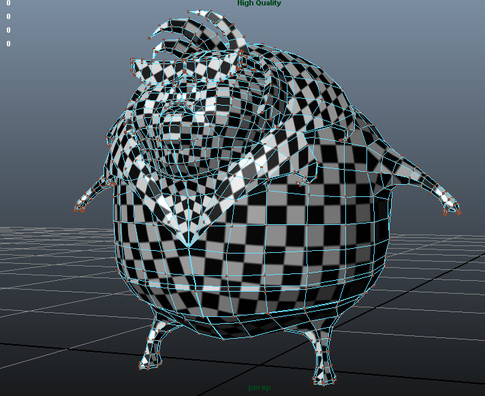
Low poly geometry being blocked in.
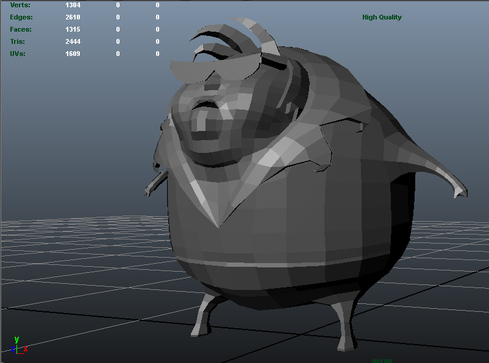
The completed low poly mesh. 2444 triangle polygons.
Step 3: UV layout.
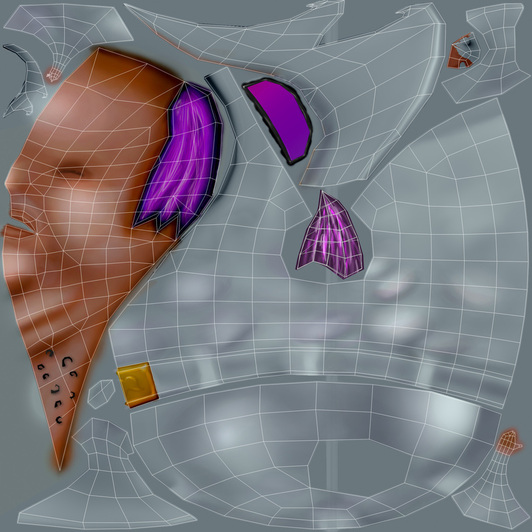
For the UV layout i am using Maya's UV texture editor. There are other stand alone tools if you prefer and some even use Z-Brush. I prefer to work in Maya as the tools are quite excellent now and make quick work of setting up and laying out the UV texture page. On the same topic if the tools are adequate i also prefer to work in as least as many programs as possible. Going to another application to do any steps has to warrant the extra time spent on bringing the assets in and out of those various applications. Just something to consider in terms of efficiency as well as the cost incurred in running multiple applications.
For the UV layout i am using Maya's UV texture editor. There are other stand alone tools if you prefer and some even use Z-Brush. I prefer to work in Maya as the tools are quite excellent now and make quick work of setting up and laying out the UV texture page. On the same topic if the tools are adequate i also prefer to work in as least as many programs as possible. Going to another application to do any steps has to warrant the extra time spent on bringing the assets in and out of those various applications. Just something to consider in terms of efficiency as well as the cost incurred in running multiple applications.
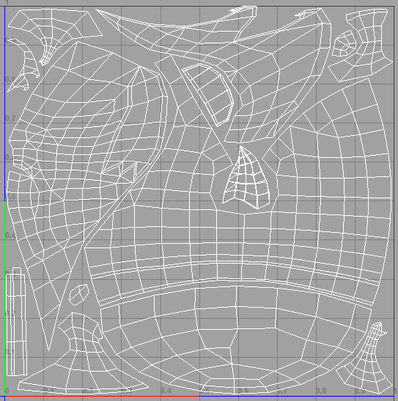
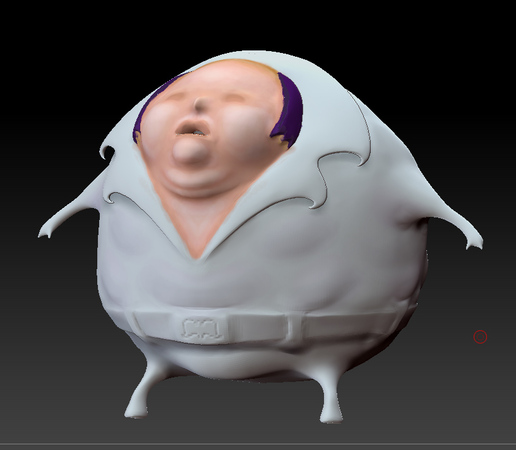
The completed UV layout. For in game run time efficiency the least number of UV pieces is ideal. This has to be weighed against even UV spacing and smearing of textures along with using as much of the texture space as possible. The latter being particularly important on assets for target systems with small amounts of video ram and rendering power. This particular asset uses a 512x512 texture so using as much of that texture space as possible will give us a crisper texture when shown on the character in game.
The UV layout on character using a checkerboard texture to identify smearing and overall evenness. The face has a higher texel density as this character would be used in an online game. Since the in game camera would often come in close up on the face giving extra texel density there is ideal. In areas that the camera may be tightly focused or there are a lot of details in the texture to describe, a higher texel density may be required. For areas like his body i went with a lower texel density because the texture has little detail, just subtle ramps of shading on his white jumper suit.
Step4: Painting Textures
I want to go with a hand painted look on this character. There are several ways to go about this step also. I will bring the mesh back into Z-Brush to mark features and details that coincide with the geometry then paint out further and refine on layers in Photoshop. One could do all the work in Photoshop and a good way of approaching this is to take a screen grab of the UV layout and then use that as a template in Photoshop. From there you can add layers and more or less see where you need to add detail by using the UV layout as a road map of sorts. I will take exactly these steps after painting inside of Z-Brush.
I want to go with a hand painted look on this character. There are several ways to go about this step also. I will bring the mesh back into Z-Brush to mark features and details that coincide with the geometry then paint out further and refine on layers in Photoshop. One could do all the work in Photoshop and a good way of approaching this is to take a screen grab of the UV layout and then use that as a template in Photoshop. From there you can add layers and more or less see where you need to add detail by using the UV layout as a road map of sorts. I will take exactly these steps after painting inside of Z-Brush.
Painting in Z-Brush using projection mode or Poly Paint. Makes no difference really for hand painted textures. If you use Poly Paint your model needs to be sub divided several times and is a little harder on system resources. Basically just want to paint in some broad areas of color and add markers were details are like belt buckle, face and wrinkles in clothing.
Here is the work in progress Photoshop showing the UV layout as a guide for painting details and areas of color. I work at 2X the target size and scale the image before exporting to game. Keeping the working psd is a very good idea as you make adjustments while prototyping in game engine.
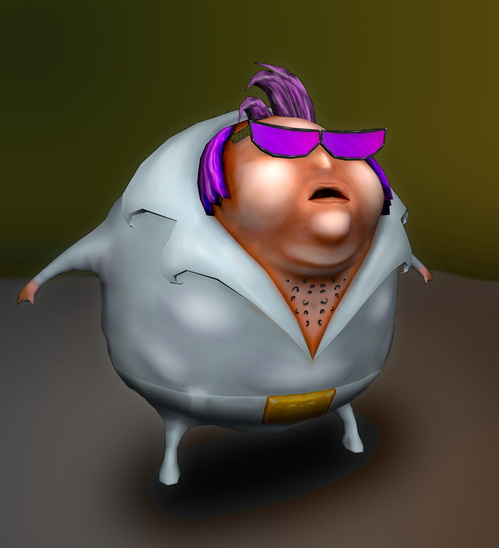
Completed texture mapped to mesh along with fake shadow. Without dynamic lighting his outfit is looking pretty plain. I think i will add some embroidered stitch designs and maybe some rhinestones. The UV's are mirrored since there are no normal maps. Even though the character is symmetrical mirroring still causes issues. Firstly symmetry kills life. They say symmetry is a sign of beauty and that may be true to a point but in computer graphics nothing takes the believably out of a character more than symmetry. The bind pose obviously doesn't help. Posing the character should defiantly help after rigging but areas like the chest hairs cause mirrored symmetry issues. Details like this can make for patterning that the eye picks up on. Whenever possible i will try to break the symmetry up by skewing the UV's on one side of the character. With a mirrored texture you can't make changes on the texture from one side to the other but you can slightly offset UV's and geometry. Again the character posing will really help with this also. I couldn't get away with much here. More detail in the outfit and then onto rigging and posing.
Some blinnng added to suit and more texture refinement. Next up rig and mesh weighting.